


Self-Watering Containers
You shouldn't be discouraged from growing vegetables on your balcony without a self watering container and not all plants appreciate growing in one. But I will tell you that life is so much better with one. Your plants can be healthier. Water plays a big role in a plant's life cycle. It is used by the plant to transport nutrients from the soil, up through it's roots and into the entire plant. This is all made possible though transpiration starting with the loss of moisture from a plants leaves. Moisture from within the leaves evaporates into the air. This loss of moisture causes water from lower down in the plant structure to be pulled up to replace it. This is how the plant pulls water from the soil.

The fill tube on a commercially available self watering container. A float in the tube with a rod on it indicates the reservoir water level.

Watering your plants in a self watering containers couldn't be easier.
When you water a traditional container, you add water to the soil surface. If you shallow water your plants, that is only soaking the top half or third of the soil in the container, your plant will suffer from a shallow root system: it will not grow deep enough to support the weight of the plant above the soil. It will not reach into the soil to make use of all available nutrients. And the lack of moisture means it will be more likely to be baked by the heat of the sun. Moisture in the potting soil will evaporate from the soil surface. In other words, the top portion of soil in the container will dry out faster, subjecting your plant to a constant moisture roller coasters.
On the other hand, excessive deep watering of your container plants has drawbacks also. Deep watering ensures you have moisture throughout the planting medium. But it also flushes nutrients from the soil. Unfortunately, in a traditional container, you need to be doing this to avoid a shallow root system. And even doing this might not prevent your plant from drying out before its next watering.
Using a self watering container will give you the benefits of deep watering without nutrient loss. I've read many complaints about self watering containers by people claiming the water reservoirs are not big enough and they need to water their plants every day anyways. But the purpose of the reservoir is not just to provide a convenient system for watering the plant. The reservoir balances the water load. It allows the plant to constantly draw water from the soil as it needs to so it doesn't experience those ups and downs between soaking wet and bone dry. Tomatoes are very thirsty plants and make excellent use of self watering containers. During the hottest months of summer when my tomatoes reach their zenith, I have to add water to the self watering containers every day. Gallons of water.
You can purchase self watering containers from a number of sources but it is quite simple to make your own. One of the quickest ways I know of to make a self watering container is with a pair of 5 gallon buckets that can be stacked one inside the other. The inner bucket holds the soil and the outer bucket acts as the water reservoir. All it takes is a few holes in the inner bucket and a perforated plastic cup to get soil from the inner bucket in contact with water in the outer bucket and you're ready to grow.
Making your own self watering container
To make your own you'll need a pair of 5 gallon buckets and a smaller plastic container to act as a basket for the inner bucket. Something like a yogurt container. Optionally you might also need a plastic 1" or greater tube at least as long as the buckets are tall and some cable ties. When you put one bucket inside the other, the inner bucket should sit above the outer bucket creating a space between the bottoms of the two buckets. This is where all the water will be stored. We'll call the outside bucket that holds the water the outer bucket and the inside bucket that holds the soil the inner bucket. The small container inside between the two will be called the wicking cup.

The wicking cup which will be filled with potting soil and sitting below the inner bucket so the soil in it is in contact with water in the outer bucket.

It is important to dril lots of holes in the bottom of the inner bucket, for drainage and aeration.
- On the bottom of the inner bucket trace out a hole big enough for the wicking cup to pass through the bottom of the bucket. The wicking cup can rest on the bottom of the outer bucket or be suspended from the inner bucket. Doesn't matter.
- I used a jigsaw to cut my holes but you should also be able to get by with a drill and utility knife. Just drill lots of holes along the circle you traced and use the knife to cut away the circle.
- Punch holes in the sides of the wicking cup so when it's filled with soil, water will flow in and soak the soil inside it.
- Drill a bunch of small holes in the bottom of the inner bucket. I used a 3/16 inch drill bit. Don't make them too big or all the soil will fall through the holes but make sure there are lots so you can get a decent supply of oxygen to the roots at the bottom of the container.
- Drop the inner bucket into the outer bucket and insert the wicking cup through the bottom of the inner bucket.
- If you want an easy way to fill the container, you can add a fill tube. Cut one end of the tube at a 45 degree angle and cut a hole in the bottom of the inner bucket near the side of the bucket for the fill tube to go through.
- Insert the fill tube into the hole and let it sit on the bottom of the outer bucket. Because it is cut at 45 degrees, there will always be an opening for water to flow out and into the water reservoir between the bucket bottoms.
- You can attach the tube at the top lip of the inner bucket with a cable tie. Just drill a pair of holes through the inner bucket on either side of the fill tube, pass the cable tie through and fasten it.
- Put an overflow hole in the outer bucket. Drill this hole in the outer bucket just below the bottom of the inner bucket. The drain hole will keep the reservoir form overflowing and flooding the soil chamber and you can also use it to let you know when the reservoir is full.
- If you are not using a fill tube, make this overflow hole really large (over an inch): big enough so you can fill the reservoir using a hose or watering can.

The fill tube, poking up over the soil surface.
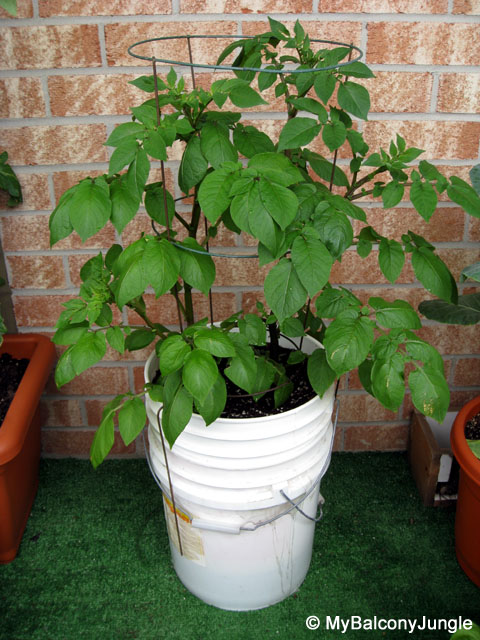
Purple potato plants growing in my 5 gallon bucket self watering container.
And there you have it: a self watering container. When you put soil in the bucket, fill the wicking cup at the bottom of the inner bucket first and pack it in. If the hole for the cup was too big, use a rag or something to fill the void between the basket and hole in the inner bucket to keep soil from sliding through the gap between the basket and the bottom of the inner bucket. Fill the rest of the container with moist potting soil. For the self watering container to self water, the soil in the container has to initially be damp. You may have to water the soil surface of your self watering container first to "prime" the system. And remember that when your plants are small they will not be drawing much moisture from the soil so don't panic if at first it seems like your reservoir is always full. Trust me: big thirsty tomatoes will drain a couple of gallons of water on a hot summer day.
My first growing experiment with a 5 gallon bucket self watering container was with potatoes. They are deep soil loving plants and crave the moisture: perfect for this sort of container. And I had no problems providing my plant with all the water it wanted. When the plant was at its peak I was filling the reservoir every third day. A tomato plant would also be very happy in this container.
If you have a lid for the inner bucket you can use it as a cover for the container. Cut a hole in the middle of it, a couple of inches in diameter, and when you have a seedling planted in the container put the lid over. This will slow the rate of moisture evaporation from the soil surface and help to retain heat. You can add dry granulated fertilizer to your container in a single batch at the soil surface. If you plan to cover the container, you don't even have to bury it. You can also add water soluble fertilizers to the water you use to water you self watering container.

A self-watering container I made from a pair of 18 gallon totes. I cut the bottom off one and used it inside the other to keep the soil above the water reservoir. I have a few of these on my balcony.
Another way to get water from the reservoir up to the soil is with some sort of wick instead of a wicking cup. I've used old cotton t-shirts to do this. Just punch a hole in the bottom of the inner bucket just big enough to squeeze the wick through with a wad inside the bucket and enough underneath to hang into the water reservoir. Water will be drawn up through the cotton from the reservoir into the soil. It works but I think the wicking cup is a better approach.
A quick Google search will turn up all kinds of sites and youtube videos with plans for making these things out of pretty much anything that will hold water. The most important criteria is that the containers be stackable within on another. My container of choice is a Rubbermaid® storage tote. But instead of stacking one inside the other, I cut the bottom 6-8 inches off one tote, turn it upside down, and rest it inside the other tote. I punch holes through the sides and use plastic cable ties to fasten the inside piece to the outside tote. And I cut a hole through the side at the top of the reservoir area so I can fill it with water. The tote approach gives me more growing space and the added benefit of handles on the sides and a lid for the top.