


Starting Seeds Indoors
The vegetable varieties I typically want to grow I can't find as starter plants in any of my local garden centers. Since I rarely grow more than three or four of any given vegetable, it makes sense to buy seedlings form a garden center whenever they're available. But with starting from seed as an option, there are so many more varieties available. It also gives me the option to start my plants organically and I know of very few places in my area that sell certified organic starter plants. Some plants you need to start from seed - pretty much anything with a tap root, like carrots and peas. And starting from seed also lets me get a head start on the season.
What you'll need:
Seeds
Seeds come in all shapes and sizes. They can last for up to five years if maintained in a cool dry environment. They will not just all of a sudden stop germinating but each year fewer and fewer will germinate as the seeds become less viable with age. A pack of seeds will contain anywhere from a dozen to a thousand seeds depending on the variety. One of the organic seed sources I use offers seeds in packages with as few as ten seeds. I buy tomato seeds this way. It's an economical way for container gardeners to try a few different varieties without committing to an entire pack of seeds.
If you're uncertain whether or not your seeds will germinate, dampen some paper towel and fold it a few times around a dozen seeds. Place this in a sealed container like a jar and place it in a dark and warm place. Check on the seeds every now and then to see if any have germinated. Compare the time it takes with the time given on the seed packet. I generally find that under the recommended conditions seeds will germinate faster than the given time.
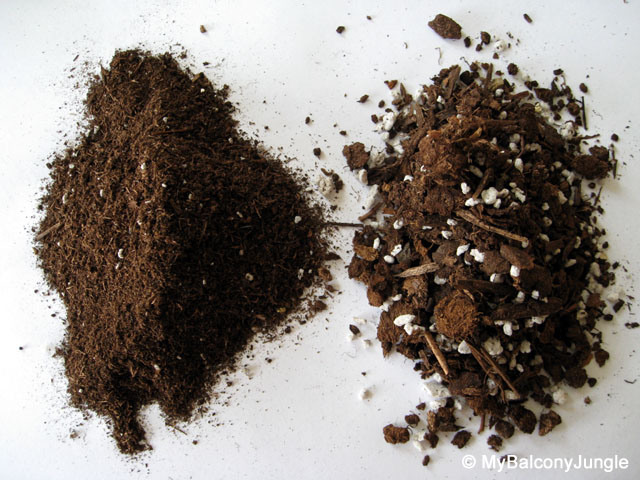
Sifted potting soil, to better show all the unwanted sticks, bark and stones.

Recycle containers for starting seeds.
Soil
Use a good sterile potting or seed starting mix. A sterile mix will ensure there are no pests or pathogens waiting to take out your seedlings. I try not to use soil from existing containers. Apparently you can sterilize your potting soil in the microwave oven but I've never tried and likely won't. Potting soil is typically made up of peat moss and some perlite and/or vermiculite to assist in water retention and aeration. Sometimes a slow release fertilizer is present. Organically certified potting soils usually contain compost. In either case there will not be enough nutrients to sustain a growing plant but should be enough to get your seeds started.
Go through the soil you plan to use for seed starting and remove any sticks, rocks or hard clumps. Sift through it well. Potting soils need to be damp before use but not soaking wet. A fresh bag of potting soil will typically be pre-moistened. If the soil is too dry it will not easily absorb more moisture. Being damp also makes it much easier to work with.
Containers
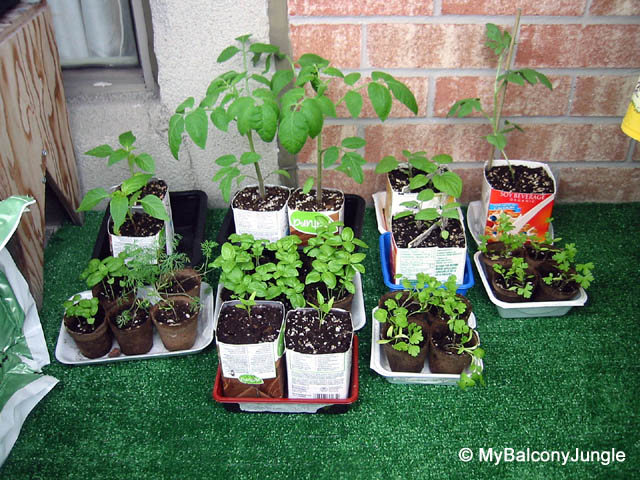
I (sometimes) believe in the cheap-is-best approach and recycle often. My new favorite containers for starting seeds are juice boxes. The 200mL tetra paks are the perfect size and I have plenty available. Just cut off the top and add holes in the bottom for drainage. For larger plants like tomatoes, melons and cucumbers I like to recycle 500ml and 750ml yogurt containers. Again, make sure you punch a few holes in the bottom for drainage. You can also reuse what your starter plants from the garden center came in last season. Just wash them our before use. I never seem to have any around when I need them. In the past I've also used peat pots and they were fine but I don't like planting them in the ground with the seedling still in them. I usually rip the pot off the root ball before planting.
Light

A small shop light held up with a recycled wood frame to provide supplemental lighting for seedlings.
Most seeds germinate in the dark so don't bother putting them out in the sun before they've poked out of the dirt. I like to loosely cover mine seedling containers with a bit of plastic wrap to trap moisture so they don't dry out so fast. In a window sill, with the sun beating down on them, the soil in the little containers will bake into a hard brick. You have to keep the seedlings moist but not waterlogged. It doesn't take much to rot them either.
If you can, provide supplemental light using florescent bulbs. The seedlings must be a few inches below the light for best results. Prop up each individual or group of seedlings with blocks to get them close to the light. I was able to produce less leggy pepper and broccoli seedlings with this sort of supplemental lighting.
Water
Keep the soil moist but not too moist. Some say it's a good idea to let the top of the soil dry out a little between waterings. White mold can form on the surface of the soil if kept too moist and cool and this can lead to Damping Off Disease. Instead of watering from above you may want to consider watering your seedlings from below. If they are sitting in a tray you can add water to the tray and it will be soaked up by the soil in the pots. Don't let them sit in water for too long though as this can lead to root rot.
If the soil dries completely, it will not readily accept more water. Potting mixes need to be moist in order to draw more moisture into them. If you're pots dry out, give them a good soaking and ensure the soil has been moistened consistently.
Warmth
Different seeds have different germination requirements. For the most part, room temperature will be warm enough although providing a little extra heat for some seeds will really give your seedlings a boost, particularly heat loving plants like tomatoes and peppers. You can purchase heating mats to place under your seedling that will boost the temperature a few degrees beneath to pots.
Some seeds germinate better in cooler temperatures. Anything that is considered a spring or fall crop. Again, I just stick with room temperatures. Some of these cool weather seeds actually benefit from being kept in the freezer just before planting but I've never tried this.
Getting started
- Prepare your soil. Go through your chosen potting mix and pick out any sticks or stones you may encounter. Break down or get rid of any clumps. Moisten the soil if it seems a little dry.
- Fill your container with your potting mix and gently press it into the container but do not pack it down tightly.
- Fill the container to within 1/4 to 1/2 inch form the top.
- Place 1,2 or 3 seeds on the soil. For larger seeds you should make a small depressions in the soil with something like a pencil and put a seed in each hole. It is better to plant seeds shallow than too deep.
- Cover the seeds lightly with vermiculite or more soil. No more than 1/4 inch and less for smaller seeds. Some seeds prefer to germinate on the soil surface in the presence of light. Check the instructions on the seed package.
- Gently water the container but be careful not to water it so much that the seeds are washed into the soil and displaced.
- Make sure everything is labeled appropriately. I had 4 varieties of pepper started once and didn't label them. I eventually forgot what was where and the seedlings all looked the same. I had no idea what I was planting where that year.
- Place the containers someplace out of the sun until they start to sprout above the soil surface.
- Have an idea of how long it should take your seeds to come up. You can always start again if something goes wrong.
- Once the seedlings are up you should move them into the light.
- When the seeds start to sprout, if you've planted more than one seed in each container, pinch or cut off the weaker ones so you're left with just one seedling per pot. You can pull them out also but this may disturb the roots of the seedling you want to keep.
- Keep the seedlings moist but not too moist to avoid rot. It is also beneficial to provide some gentle air circulation around your seedlings.
- The first pair of leaves your seedlings put out are called cotyledons or seed leaves. The next set will look like the leaves the plant normally grows and these are the first true leaves.


Transplanting your seedlings
When your seedlings reach the right size it will be time to transplant them to their permanent home. Typically you can do this after they form their third or fourth true leaf although you may need to wait longer for the weather to warm up.
Before transplanting, seedlings should be hardened off. They've been growing in a sheltered environment and to survive living outside they must get used to the elements. You can start by putting the seedlings outside for a couple of hours a day under partial shade and gradually increase their exposure to the outside world until they can tolerate a night on their own. I usually put mine out and then forget to bring them in which is fine if the weather doesn't turn foul. The more hardening off time you can provide, the better: a week or two perhaps. By the time I'm ready to plant mine they're living out on the balcony 24 hours a day.
When removing seedlings from their pots, I find that if the soil is too dry it will crumble away from the roots when the seedling is freed and if it is too wet it will slip away from the roots also. If the seedling is pot bound, with the roots so thick that they form a mass that circles the inside of their container, gently loosen the roots before planting. You may have to rip some of this root mass away first.
Prepare your container and dig out soil from the spot you want to plant the seedling so that the root ball of the seedling will sit in the container at about or just below the same level as it does in its starter pot. It doesn't have to be exact but some seedlings will not tolerate being buried too deep. Lettuce for example will rot if buried too deep. Tomatoes on the other hand will benefit from being buried as deep as you can put them.
Fill in the gaps around the root ball, gently pack it into the soil and give it a good drink of water. Newly planted transplants will be vulnerable to strong wind and cold weather while their root systems become re-established and they recover from the stress of being up-rooted. Keep newly transplanted plants shaded. Do not over water and do not apply fertilizer until it looks like the plant is growing again.